In this demo I assume you have already configured a pipeline in Azure Data Factory and you want only to send an email at the end of it.
1. Create a Logic App
Create a Logic App (Consumption Type)
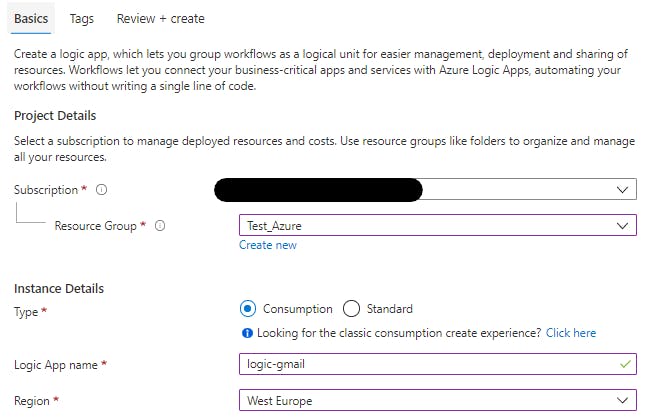
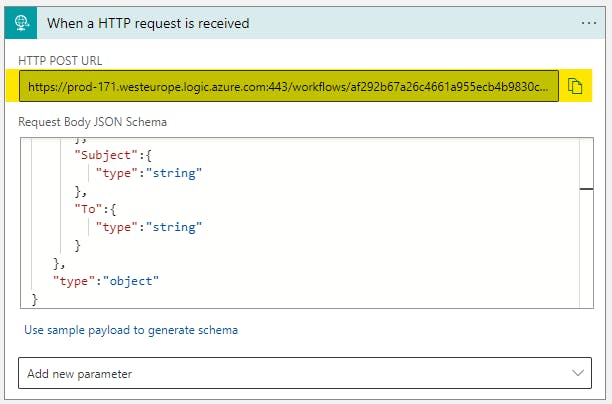
Once the deployment is complete, go to the Logic App and choose the "When a HTTP request is received" trigger.
In the designer, in the "When a HTTP request is received" tab, you have to write a simple JSON like this:
{
   "properties":{
      "ADFName":{
         "type":"string"
      },
      "HtmlBody":{
         "type":"string"
      },
      "Subject":{
         "type":"string"
      },
      "To":{
         "type":"string"
      }
   },
   "type":"object"
}
ADFName will be the name of our Azure Data Factory pipeline, the others are our email parameters. Once you save, in the "HTTP POST URL", a generated url will appear. Copy it, we will need it later.
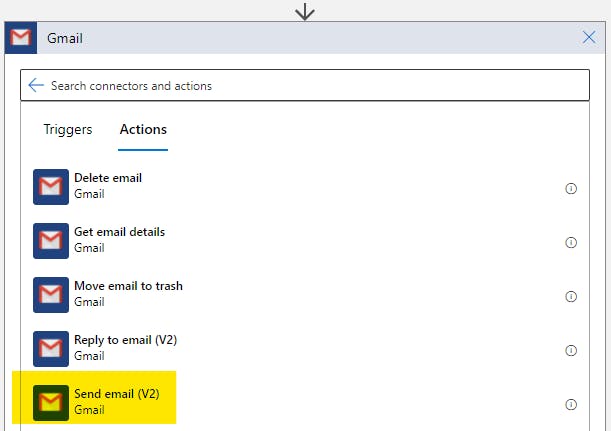
Then, add a new step. You can see you have lots of opportunity, in the example I use the Gmail Send Email action.
If you use the default shared application authentication type, you have only to login to your Gmail account. Now you have to add the email parameters you want: with Gmail you don't have the From parameter but if you use, for example, Sendgrid, you can set also that. We now add To, Subject and Body, and use the "Add Dynamic Content" link to add the parameters we have setted earlier in the JSON.
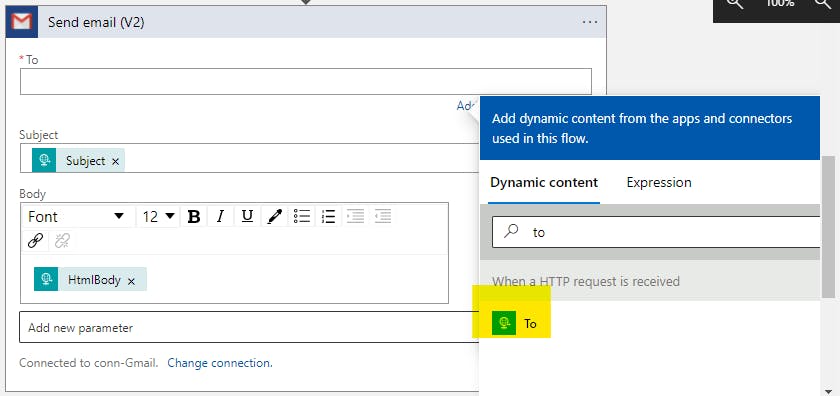
Then, we can save the Logic App and Open our Data Factory pipeline.
2. Add to Azure Data Factory
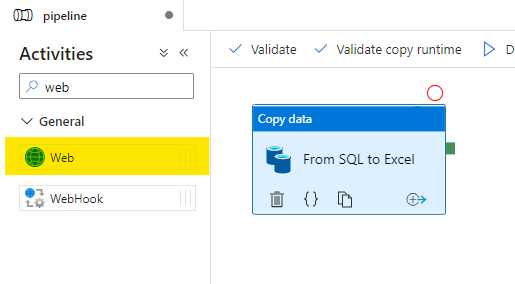
In your pipeline, add a Web activity
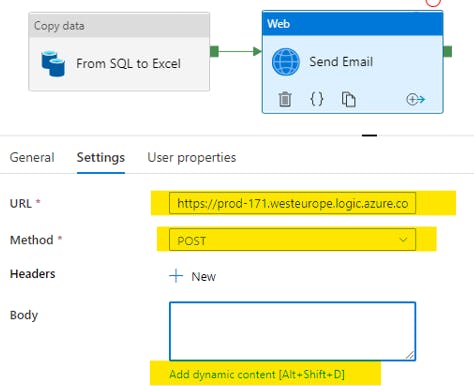
In the General tab give a name to the activity, in the Settings insert the url copied earlier in the appropriate space and choose POST as method. Enter the Body space and an "Add dynamic content" link will appear. Choose it.
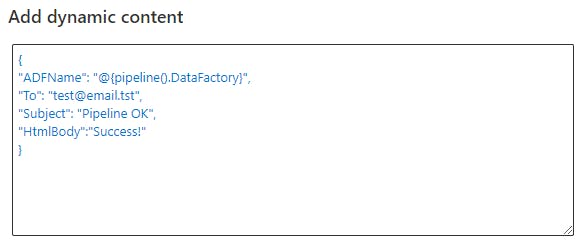
Here we have to add all our parameters names defined in the JSON and associate them with the parameters. I have wrote directly the parameters in the dynamic content except for the Data Factory Name, but you can use your pipeline parameters instead. Remember to use the @{[Parameter]} syntax. You can use HTML tags in the body.
{
"ADFName": "@{pipeline().DataFactory}",
"To": "test@email.tst",
"Subject": "Pipeline OK",
"HtmlBody":"Success!"
}
Choose ok. Now we can publish the pipeline and trigger it. The email will be sended at the end of the pipeline steps.